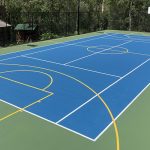
A Guide to the Process of Tennis Court Resurfacing
Tennis is a game that is enjoyed by millions of people around the world. Whether you’re a seasoned pro or just a casual player, you know that the quality of the tennis court surface can significantly affect your game. Over time, tennis courts can wear down and become less safe and enjoyable to play on. That’s where tennis court resurfacing services come in. In this guide, we’ll take you through the tennis court resurfacing process, step by step, so you can better understand how it is done and why it’s essential.
Why Resurfacing Matters?
Before diving into the nitty-gritty of the resurfacing process, let’s talk about why it’s essential. Tennis court surfaces can degrade over time due to various factors, including:
Weather: Rain, snow, and extreme heat can impact a tennis court’s surface.
Usage: The more a court is used, the quicker it will wear down.
Aging: Like all things, tennis courts age and require maintenance.
When a tennis court surface is in poor condition, it can:
Affect Gameplay: Bumps and cracks can lead to uneven bounces, making the game less enjoyable.
Increase Injury Risk: Worn-out surfaces can be slippery and increase the risk of accidents.
Reduce Aesthetics: An old and tired-looking court can deter players and visitors.
Tennis court resurfacing becomes necessary after a certain point to ensure a safe and enjoyable playing experience.
Step 1: Assessment
The first step in the resurfacing process is to assess the current state of the tennis court. It involves a careful inspection of the surface, including:
Cracks: Identify any cracks in the court surface, no matter how small.
Puddles: Note areas where water accumulates after rain.
Colour Fading: Observe whether the court’s colour has faded significantly.
Surface Wear: Check for areas where the surface has worn down.
Based on this assessment, you can determine the extent of the work needed and plan accordingly.
Step 2: Cleaning
Before any resurfacing work can begin, the tennis court needs to be thoroughly cleaned. It involves:
Sweeping: Removing debris, leaves, and loose dirt from the court.
Pressure Washing: Using high-pressure water to clean away dirt and grime.
Mould and Algae Removal: Treating and removing any mould or algae growth.
Stain Removal: Addressing any stains on the surface.
A clean surface is essential for the resurfacing materials to adhere appropriately.
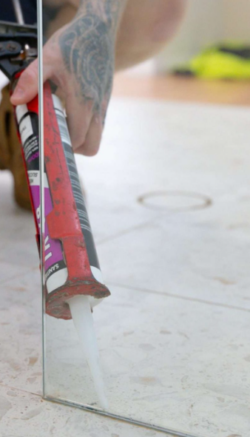
Step 3: Crack Repair
If there are cracks on the court, they need to be repaired to ensure a smooth playing surface. The crack repair process involves:
Cleaning: Removing debris and loose material from the cracks.
Filling: Filling the cracks with a specialized filler material.
Smoothing: Smoothing the filled cracks to create a seamless surface.
Crack repair is crucial to prevent cracks from worsening and compromising the court’s integrity.
Step 4: Surface Preparation
Before applying the new surface coating, the existing surface may need some preparation. It may include:
Patchwork: Addressing any areas with significant damage or wear.
Levelling: Ensuring the surface is level and free of irregularities.
Priming: Applying a primer to help the new surface adhere properly.
Surface preparation ensures that the resurfacing material bonds effectively with the existing court.
Step 5: Resurfacing
Now comes the most critical part of the process—applying the new surface coating. There are several options when it comes to the type of surface, including:
Acrylic Resurfacing: This is a popular choice for tennis courts, known for its durability and good bounce.
Cushioned Surfaces: These provide extra shock absorption, reducing stress on players’ joints.
Clay and Har-Tru Surfaces: These surfaces are favoured for their slower play and softer impact.
The chosen surface material is applied in multiple layers, with each layer needing time to cure before the next one is added. Proper curing ensures a long-lasting and high-quality playing surface.
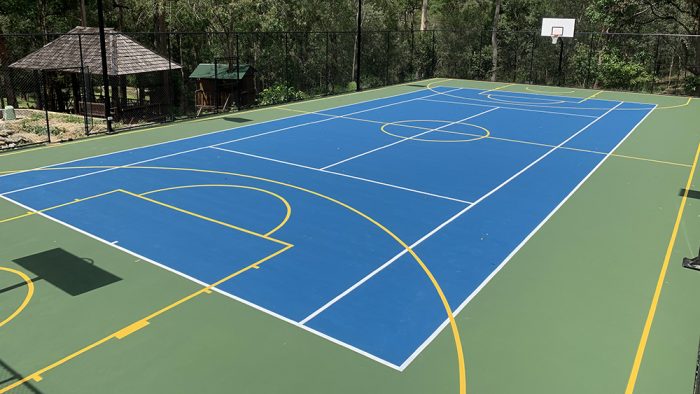
Step 6: Line Striping
Once the new surface is in place and cured, it’s time to add the court lines. Line striping is a crucial step, as it defines the boundaries of the court and ensures that it complies with official tennis regulations. Proper measurements and precision are essential to get the lines just right.
Step 7: Finishing Touches
With the court lines in place, the final touches are added to complete the resurfacing process. It includes:
Colour Coating: Applying the final colour coating to the court surface.
Logo and Branding: Adding any desired logos or branding elements.
Net Installation: Setting up the net and ensuring it’s at the correct height.
Fencing and Accessories: Inspecting and, if needed, repairing or replacing fencing and accessories around the court.
These finishing touches enhance the court’s appearance and contribute to its functionality and safety.
Step 8: Inspection and Quality Control
Before declaring the resurfacing project complete, a thorough inspection is necessary. This inspection involves:
Surface Smoothness: Ensuring the surface is smooth and free of imperfections.
Line Accuracy: Checking that the court lines are straight and correctly placed.
Safety: Verifying that the court is safe for play, with no tripping hazards.
Colour Consistency: Confirm that the colour coating is even and consistent.
Quality control is crucial to delivering a high-quality tennis court that meets all standards.
Step 9: Maintenance and Care
Once the resurfacing process is complete, it’s essential to maintain and care for the court properly. Proper maintenance can extend the life of the court surface and keep it in top playing condition. Maintenance tasks may include:
Regular Cleaning: Sweeping and pressure washing to remove dirt and debris.
Repainting Lines: Periodically repainting the court lines to maintain their visibility.
Crack Inspection: Regularly checking for new cracks and addressing them promptly.
Resurfacing as Needed: Planning for future resurfacing projects as the court ages.
Conclusion
Affordable sports court installation is a vital process that ensures tennis courts’ longevity, safety, and quality. It’s not just about making the court look good; it’s about making it a place where players can enjoy the game to the fullest while staying safe. Whether you’re a tennis enthusiast or a facility manager, understanding the process of tennis court resurfacing is essential to maintaining a top-notch playing experience.