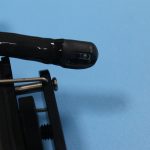
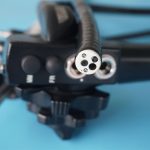
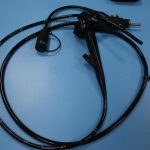
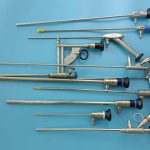
FY MED Endoscopy Scope
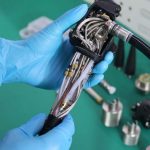
FY focuses on high-quality endoscopes and the surrounding endoscopy equipment for more than 10 years. We are very familiar with the structural characteristics of the medical endoscopes for sale from big brands such as Olympus, Fuji, Pentax, Wolf, STORZ, Smith & Nephew, Schoelly, and so on. We provide different kinds of endoscope medical services for flexible endoscopy, rigid endoscopy, and camera systems, such as a host of renovation, consulting, testing, maintenance, upgrade system, installation, training, etc.,
As a professional endoscopy equipment supplier, we have a self-built endoscope repair lab, professional repair workshop, professional testing, and repair equipment, a professional repair engineer team, and provide endoscope repair services for more than 3,000 companies and hospitals every year.
With a huge spare parts stock, we can speed up our repair progress and improve efficiency.
A professional technical team can provide you with free remote technical support for different types of endoscopy equipment. Buy China endoscopes at great prices now!
Different Types Of Endoscopy Equipment For Sale
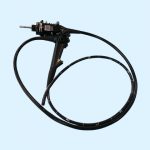
Flexible Endoscopy
We Provide pre-own, refurbished, patient-ready flexible endoscopy in good working condition for sale and ship worldwide as customer’s need.
Rigid Endoscopy
We Provide pre-own, refurbished, patient-ready Rigid Endoscopy in good working condition for sale and ship worldwide as customer’s need.
Endoscopy O/R Camera
We provide kinds of Medical Camera head with OEM Cables for sale and ship worldwide as customer’s need.
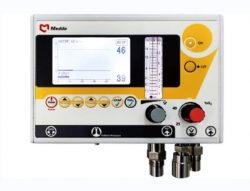
Endoscopy Processor
1. Ground-breaking resolving power for efficient diagnosis;
2. Brighter, more powerful Narrow Band Imaging;
3. Outstanding, true-to-life image quality.
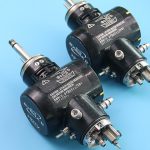
Other Endoscopy Products
We provide kinds of Medical Camera head with OEM Cables for sale and ship worldwide as customer’s need.
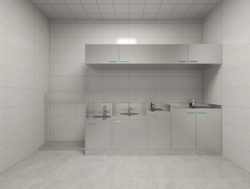
Digestive Endoscope Cleaning And Disinfection Process
Gastrointestinal endoscopes have complex structures and are used frequently on a daily basis, and there are many factors that lead to their failure and damage during the cleaning and disinfection process. According to the 2004 version of the Code of Practice for Cleaning and Disinfection of Endoscopes, we have accumulated some experience in how to avoid damage to endoscopes and prolong the service life of endoscopes by using the five-slot cleaning and disinfection method, which is summarized below according to the steps of the endoscope cleaning and disinfection process.
Step One: After Use Processing
After the endoscope is used, wipe the dirt on the outer surface of the scope with wet gauze soaked with multi-enzyme washing solution immediately, and keep attracting water for 10 seconds; in order to avoid blockage of the air and water delivery nozzle, it must also be repeatedly delivered for more than 10 seconds before unplugging the scope, and place the endoscope carefully in a coiled position on the transfer cart, install the waterproof cap, and send it to the sterilization room.
Precautions
Scrub the scope body, attraction rinse biopsy channel, gas injection water rinse gas waterway, and pay attention to prevent collision with other hard objects and sharp objects during the transit process.
Step Two: Pre-wash
Firstly, check whether the waterproof cap is installed. Then put the endoscope lightly in the preliminary washing tank, wash thoroughly under the flowing water, hold the operating handle in the left hand, and scrub the scope body and connection part with wet gauze in the right hand, because the endoscope is hovering in the square tank when scrubbing, not in the free position, scrubbing action should be gentle, do not use violence, and prevent the lens from colliding with the wall of the cleaning tank. Remove the attraction and air and valve suction, biopsy inlet valve and C-cover, brush with a small brush and dry with dry gauze, and put into the enzyme cleaning solution to soak. Install the cleaning accessories, the left hand holding the operating handle, the right hand with a high-pressure water gun to flush the endoscope cavity and the tubes, and then brush the scope cavity and each clamp channel, to see the brush at both ends, the brush to clean, brush several times until it clean. After brushing, rinse the scope cavity and scope body with a high-pressure water gun, then dry the scope body with dry gauze, then blow-dry the water in the scope cavity with an air gun, and transfer the endoscope to the enzyme cleaning tank.
Precautions
Endoscope should be cleaned immediately after unplugging to prevent dirt from solidifying in the water and air delivery tube, thus causing water and air delivery obstruction; waterproof cap should be installed intact to prevent leakage caused by poor sealing; C-cover should not collide with other objects to avoid damage to the lens of the endoscope; do not wash with other sharp objects at the same time to prevent damage to the outer skin causing leakage; endoscope rotation diameter should be greater than 30cm, if the angle is too small it will cause damage to the scope; rinsing air gun pressure should be between 0.2 ~ 0.4MPA when cleaning, too much pressure may cause damage to the scope cavity pipeline; repeated use of accessories should be used once to disinfect once, if the cleaning accessories are deformed, it can not be used, so as to avoid the biopsy channel is brushed, causing the pipeline to break and leak; after the first washing, the scope should be kept dry before enzyme washing, so as not to dilute the multi-enzyme washing solution.
Step Three: Enzyme Washing
Immerse the endoscope completely in the multi-enzyme washing solution (commonly used 1:270 Ruwow multi-enzyme washing solution), and connect the automatic irrigator to the biopsy channel and water and gas interface. Press the start button and suck the enzyme washing solution into the endoscope orifice. Wipe the operating part with the gauze of enzyme washing solution, hold and put it gently. After the irrigation is finished, remove the irrigation plug and put it into the cleaning tank; After the water and suction valve, biopsy valve, and c-cover soaking with enzyme washing solution, put them into the cleaning tank together.
Precautions
Change the enzyme washing solution once used. Do not remove the quick plugin advance before the enzyme washing solution irrigation is finished. If you want to temporarily terminate the irrigator, please press the reset button and then take it out. The soaking time is 3~5min, if the time is not enough, it cannot effectively decompose the proteins remaining on the surface of the endoscope and the inner surface of each tube, which will easily cause yellow spots on the outer surface of an endoscope or form a bacterial biofilm, and affecting the cleaning and disinfection effect and shortening the service life of endoscope.
Step Four: Cleaning
Take out the endoscope from the enzyme washing tank into the cleaning tank. Open the tap and sewer switch, scrub the scope body with gauze under the flowing water and rinse the scope cavity with a high-pressure water gun; try to blow dry the water in the scope cavity and wipe out the water stains on the scope body.
Precautions
Wash the scope body, rinse the scope cavity, blow-dry the water in the scope cavity, and wipe the scope body dry to prevent enzyme washing solution from remaining in the endoscope, which may affect the disinfection effect.
Step Five: Disinfection
The endoscope should be lightly placed in the disinfection tank and connected to the biopsy cavity port and air-water interface of the endoscope with the automatic irrigator interface. Press the start switch, and soak the cleaned and dried button and valve fittings together in the disinfection solution for 3~5min (acidic oxidation potential water, containing 60mg/L±10mg/L of effective chlorine and ≥1100mV of redox potential). For other disinfection solutions, please follow the instructions to master the disinfection soaking time.
Precautions
The automatic irrigator should be kept intact and unobstructed. Acidic oxidation potential water should be changed once use. The endoscope should be completely immersed in the disinfection solution, and the disinfection staff should change the disinfection gloves before removing the endoscope from the immersion tank after the immersion and irrigation. And blow out the disinfection solution in the lumen of each endoscope with an air gun or 50ml syringe.


