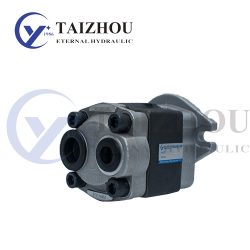
Gear Pump Manufacturers – Gear Pump Parts Process Technology Considerations
What are the technical requirements for the processing technology of gear pump manufacturing? The gear pump manufacturer stated:
(l) General technical requirements
The top of the gear of the gear is matched with the housing.
2 The inner hole taper and roundness of the housing are less than 0.01mm.
3 The radial gap between the gear and the inner bore of the housing is generally 0.02 to 0.06 mm.
4 A pair of gear width error is less than 0.005 ~ 0.01mm, a pair of gears on the same side of the sleeve width error is less than 0.005 ~ 0.01mm.
5 The eccentricity between the gear shaft hole and the addendum circle is less than 0.01 mm.
6 Check by the coloring method that the gear meshing length is greater than 65% in the tooth height direction and the gear meshing length is greater than 60% in the tooth width direction.
7The surface roughness of the gear is 0.2μm, the surface roughness of both sides of the gear is 0.2μm, the surface roughness of the journal is 0.1μm, and the other main sealing sliding surfaces of the pump (such as the inner hole surface of the bushing, the side of the bushing, the top of the tooth The surface roughness of the round surface and the inner surface of the pump casing, etc., is generally 0.4 μm.
8-axis roundness and taper are less than 0.005mm.
9 The center deviation of the center of the shell is less than 0.03~0.04mm, and the parallelism of the center line is less than 0.01~0.02mm.
(2) Process equipment At present, most of the major hydraulic component factories in China use the combination of CNC boring machines, machining centers and high-efficiency special machines (such as special high-precision grinding machines) for the processing of main parts of gear pumps, and the auxiliary machines use general-purpose machine tools.
(3) Process requirements for key parts
1 The main technical requirements for the machining of the housing shell include the dimensional accuracy of the two inner holes, the parallelism of the two inner bore axes, the perpendicularity of the two planes to the inner bore axis, the parallelism of the two planes, the surface of the two planes and the two bores. Roughness, groove depth accuracy of the outer seal groove, etc. An example of housing accuracy requirements is shown in Figure C. The main processing process is: rough milling two sides → rough milling two large faces → rough two inner holes → fine milling two sides → fine milling two large faces → drilling, hinge two positioning pin holes → drilling four bolt holes → pair Drilling, oil outlet and thread bottom hole → fine inner hole → milling outer seal groove → tapping, oil outlet connection thread → deburring → cleaning → finished product inspection → into the finished product library.
2 The main technical requirements of gear shaft gear include gear tooth profile accuracy; gear end face surface roughness, flatness, end face runout; tooth tip circle, journal size accuracy; two journal neck surface roughness and shape accuracy. An example of the accuracy requirements for the shaft gear is shown in Figure D. The main processing process of the shaft gear is: tooth blank processing ‘grinding tip hole one grinding process journal one hobbing one shaving one carburizing quenching one grinding top 孑 L a rough grinding top round one coarse grinding journal a rough grinding gear End face one fine grinding top round one fine grinding journal one super fine grinding journal one fine grinding gear end face one electrolysis deburring one throwing grinding gear end face and journal one cleaning antirust one finished product inspection ten into the finished product library.
3 bushings (side plates) The main technical requirements for machining are the positional accuracy of the center distance of the two holes, the dimensional accuracy, shape accuracy, surface roughness of the two holes, the parallelism of the central axes of the two holes, the perpendicularity of the end faces, and the gear stickers. The flatness and surface roughness of the joint plane are perpendicular to the end face of the inner diameter of the sleeve of the press-fit DU bearing, and the groove depth accuracy of the seal groove. An example of the accuracy requirements for the bushing is shown in Figure 7-5. The main processing process of the bushing is: rough milling both ends of a rough expansion two holes a rough milling two outer circles a rough milling plane one grinding plane half fine two holes half fine milling outer circle one fine two holes one finishing Round one inner hole rolling one milling inner sealing ring groove deburring one cleaning one finished product inspection one into the finished product library.
As a professional Gear Pump Manufacturers and Gear Pump Suppliers in China, Taizhou Eternal Hydraulic Machinery Co., Ltd. can provide you with high quality products and services. Eternal Hydraulics is committed to becoming the global one-stop mall for global hydraulic products, with professional hydraulic solutions and quality products to meet the needs of each customer. The company firmly believes that “only the best can satisfy the best” and has become the preferred hydraulic component of choice for all customers worldwide. https://www.xjetl.com


