Separation Cream from Milk: Step-by-Step Process
Milk naturally contains fat. This fat rises to the top and forms cream. The separation process is simple and can be done at home or in dairies. Follow these steps to get fresh and thick cream easily.
Step 1: Choose Fresh, Full-Fat Milk
Start with pure, unprocessed milk.More fat means more cream.Avoid low-fat or skimmed milk.
Step 2: Pour Milk into a Wide Container
A flat and wide bowl helps fat rise quickly.Glass or steel containers are best.
Step 3: Let the Milk Rest
Place the container in the fridge.Keep it still for 12–24 hours.Fat slowly moves upward.A creamy layer forms on top.
Step 4: Skim the Cream Layer
Use a clean spoon or ladle.Lift the cream gently.Do not mix the milk below.Collect it in another airtight container.
Step 5: Store the Cream Properly
Refrigerate after skimming.Use within 2–3 days for best taste.You can whip it for desserts or churn it into butter.
Optional Step: Heating for More Cream
If you want a thicker layer:Warm milk slightly (do not boil).Cool it again in the fridge.More fat will separate.
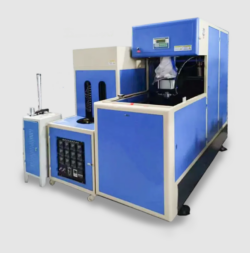
Extra Tip: Use a Cream Separator Machine
Used in dairy industries.Machine spins milk at high speed.Cream and milk separate instantly.Best for large-scale cream production.
Final Thoughts
separation cream from milk is simple and rewarding.With just a little patience, you get rich, fresh cream for cooking, baking, or skincare.Whether you use the traditional resting method or a separator machine, the result is delicious and natural cream every time.
https://freshmilkdubai.com/how-to-separate-cream-from-fresh-milk-a-simple-guide-for-your-home/